Facebook Pixel Guide
Notes:
- You do NOT have to install the Facebook Pixel to start running Facebook ads.
- You do NOT have to install the Facebook Pixel to track Facebook ad performance in Google Analytics.
- You do NOT have to install the Facebook Pixel to use UTMs.
- The Facebook Pixel is for features like retargeting and conversion tracking on Facebook. It simply makes your Facebook ads more powerful.
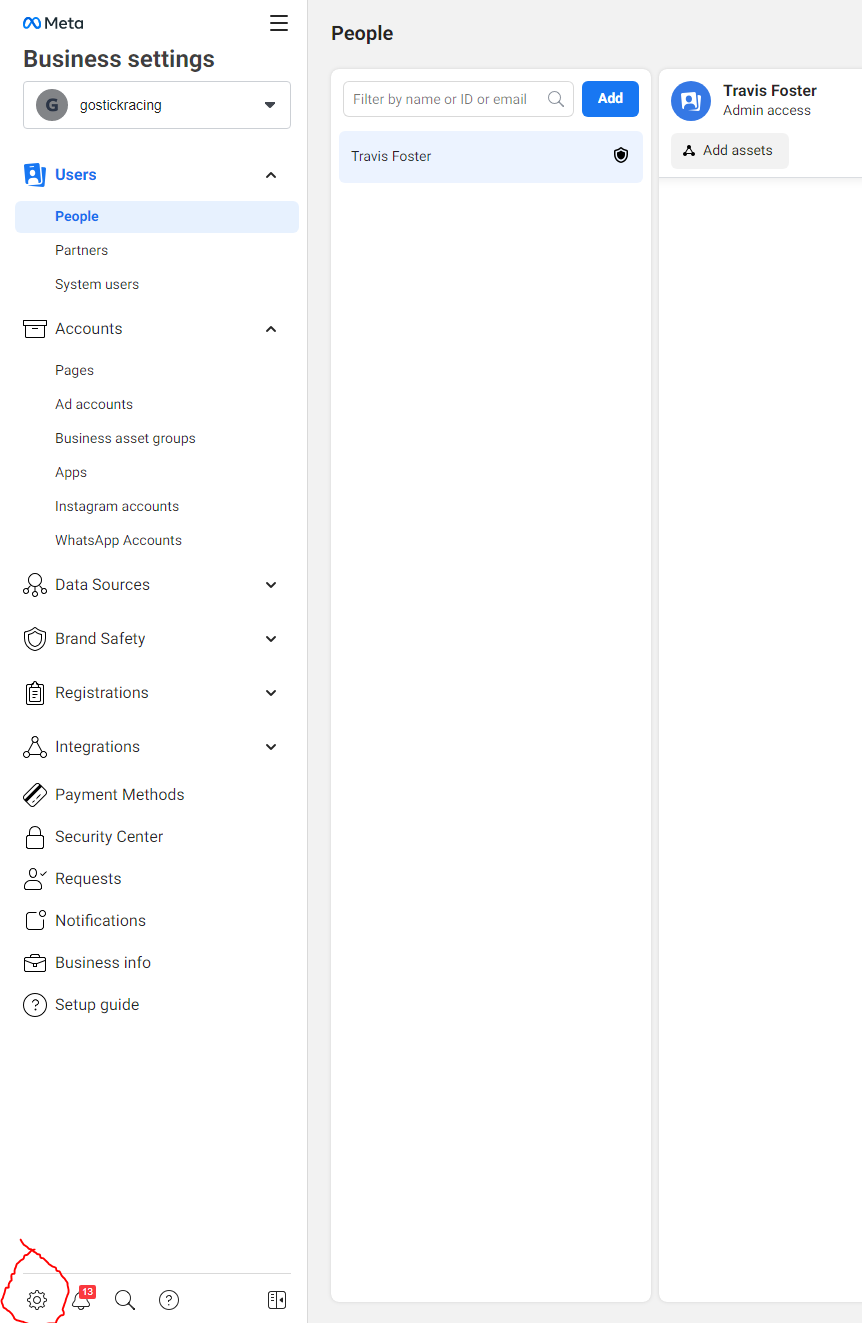
A business account allows you to manage multiple assets like Facebook Pages, Instagram accounts, Pixels, Payment Profiles, and much more. If you already have a Facebook Business account, you can skip this section.
- Go to business.facebook.com/overview.
- Click Create an account.
- Enter a name for your business, your name and work email address and click Next.
- Enter your business details and click Submit.
- Log into Facebook
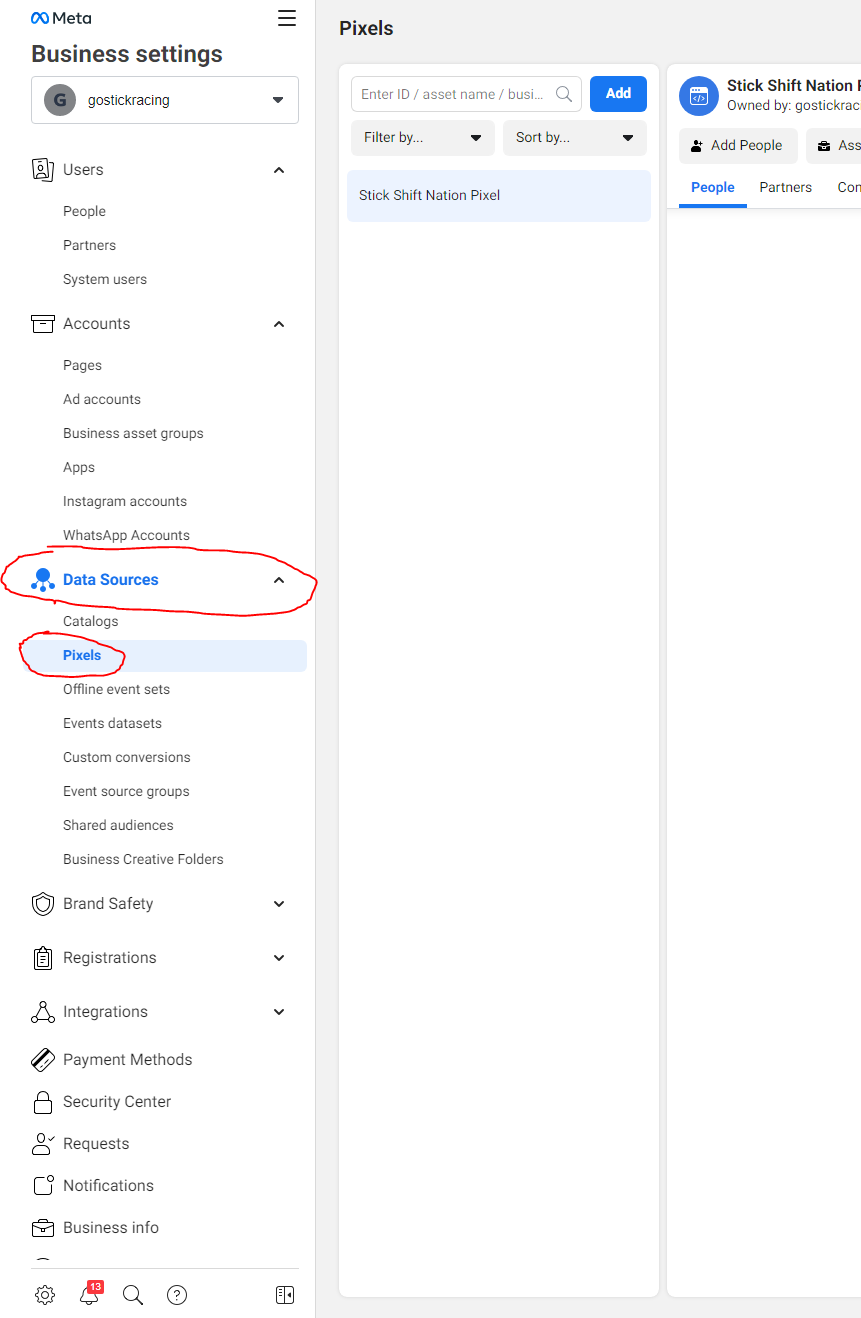
- Go to https://business.facebook.com/settings
- Select your business if prompted
- Click the settings gear icon in the bottom-left corner
- Click Data Sources in the left column
- Click Pixels in the left column
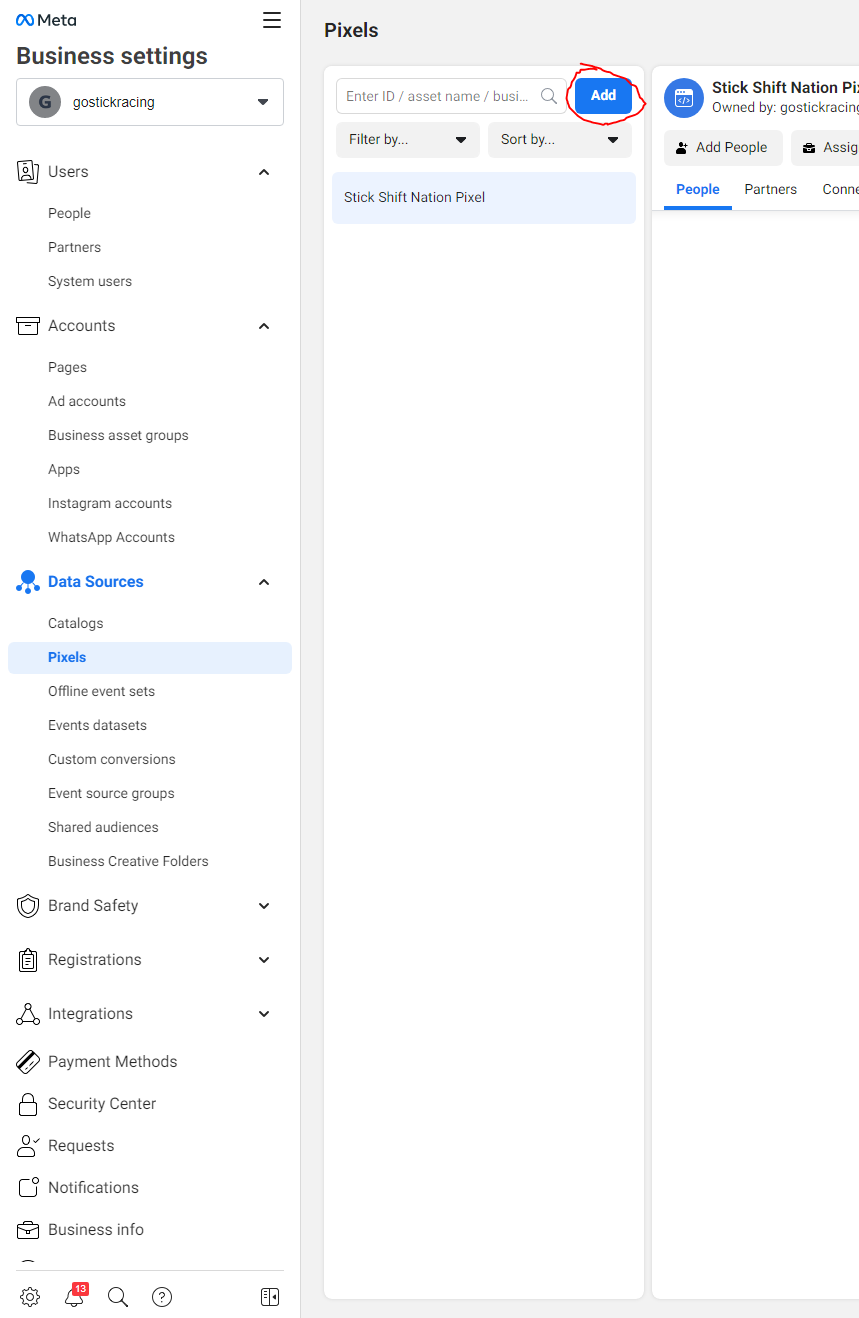
- Click Add
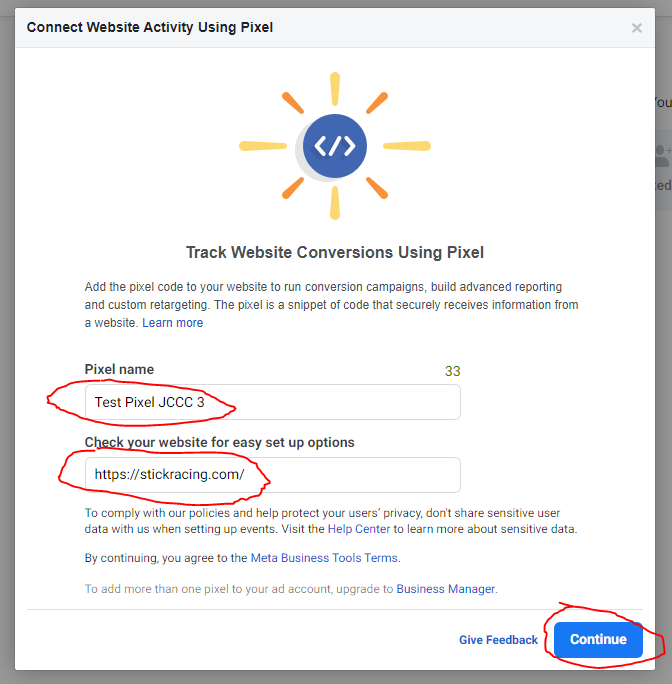
- Enter a Pixel name in the first box
- Enter your website’s URL in the second box
- Click Continue
- Continue to the next section, “How to Install a Facebook Pixel”
Your Content Goes There are many ways to install a Facebook Pixel on a website. Every website has different options available. There are 3 primary methods:
- Manual Installation
- Facebook Integration
- Google Tag Manager
Manual Installation
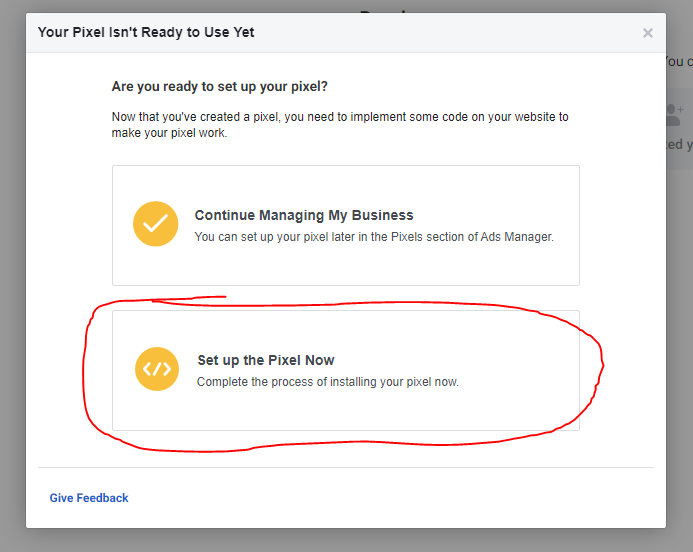
- Click Set up the Pixel Now
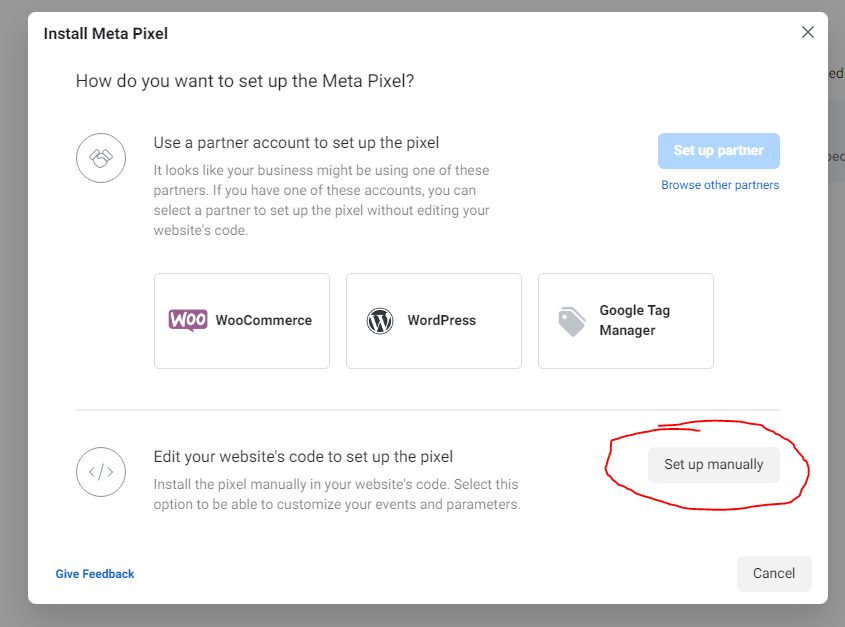
- Click Set up manually
- Copy the provided code
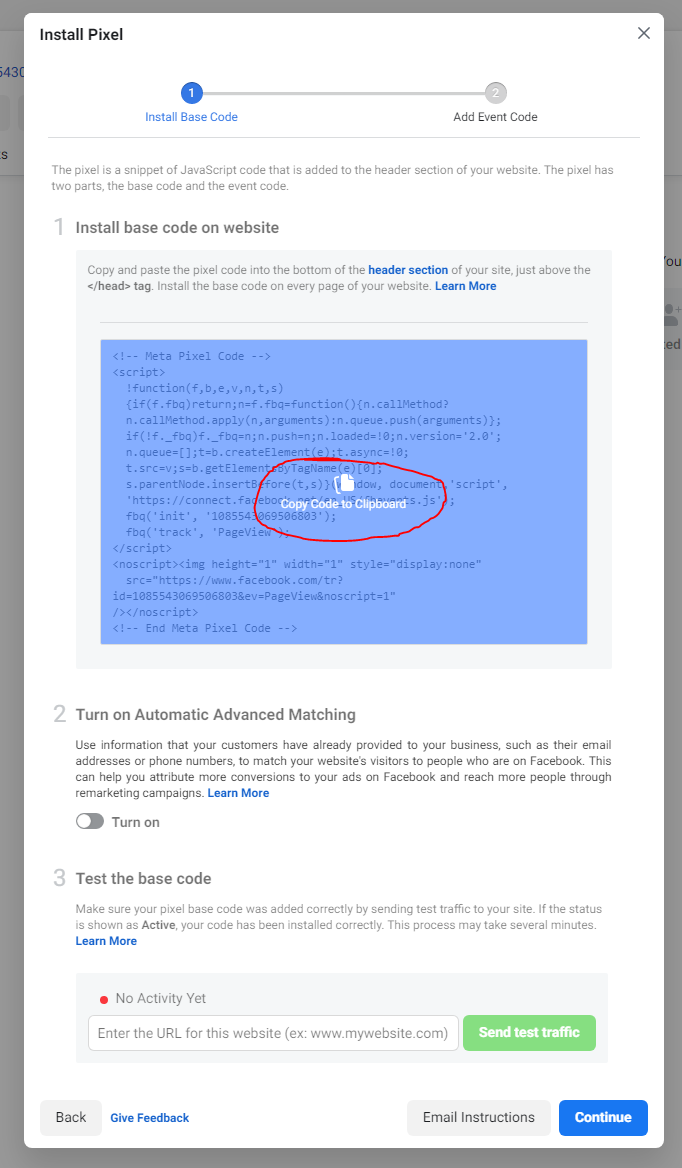
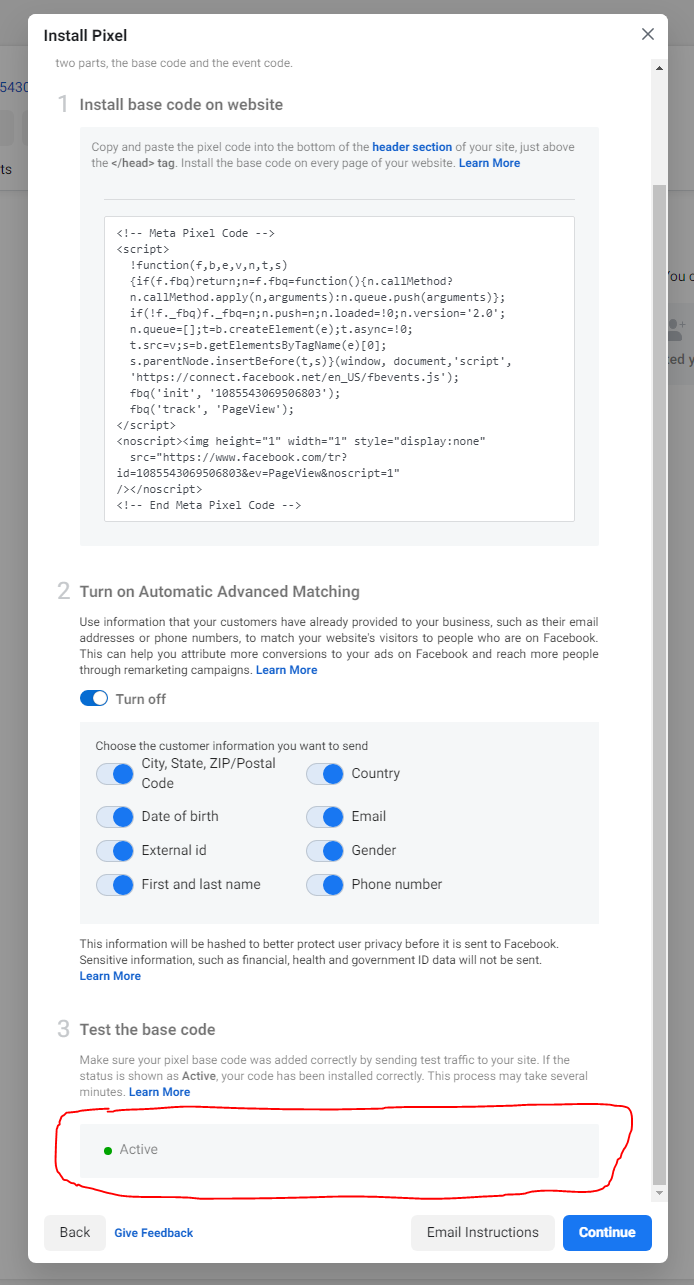
- Optional: Click Turn on Automatic Advanced Matching

- Paste the code in thesection of your website (This will take some development knowledge. For WordPress websites, there is another method for pasting code into your website. See the “WordPress Insert Headers and Footers” section below.)
- Enter your URL in the “Test the base code” box
- Click Send test traffic
- If done correctly, the box should now read, “Active”
Here